Projects
Projects in ColdFront are containers that allow faculty to organize their resource allocations and personnel. This allows you to have a project for your research group and a separate project for use by your class.
Creation
Projects in ColdFront can only be created by faculty and staff, students do not have permission to create projects. Students can be added as Managers to help administer a project if the project owner wishes.
To create a project:
-
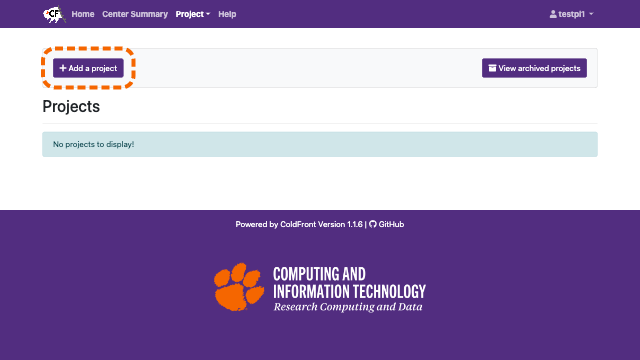
Go to the projects list page in ColdFront.
-
Select the Add a project button.
-
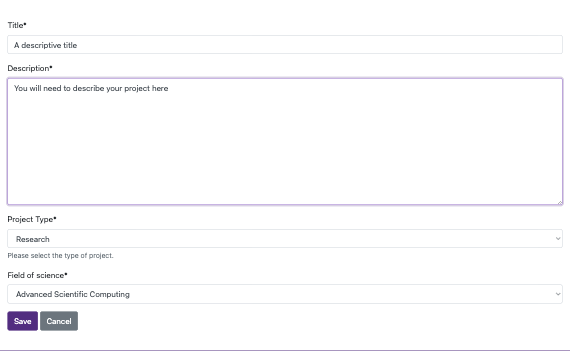
Fill out the form. The form varies depending on the project type. When you select a Research project type, you are asked about the field of science.
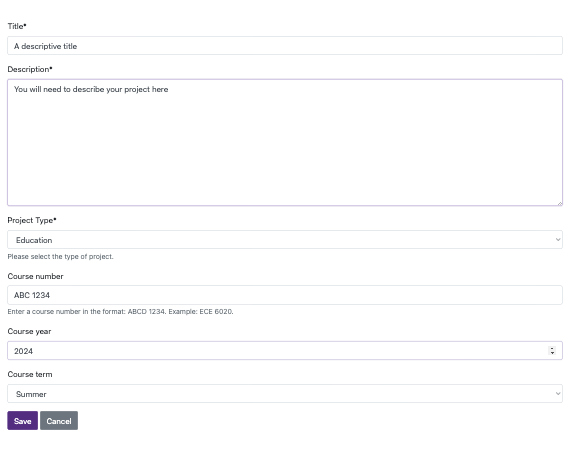
When you select an Education project type, you are asked about the course details.
-
Click Save.
User Management
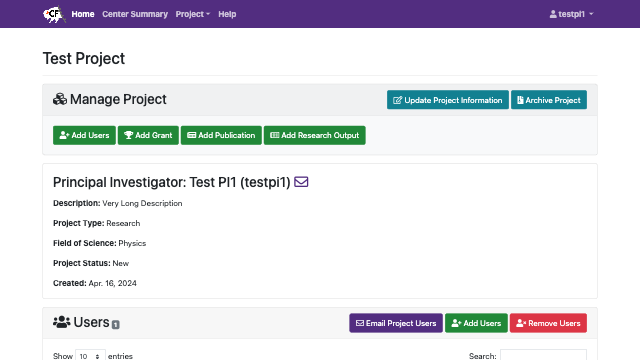
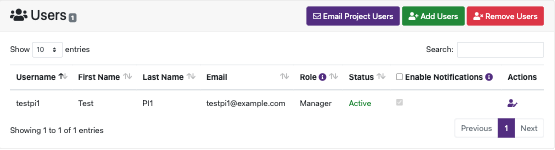
Users can be added and removed from a ColdFront project to control access to the allocations available in the project.
Adding Users
-
Go to the project page. You can select it from the projects list page.
 .
. -
Select the Add User button.
 .
. -
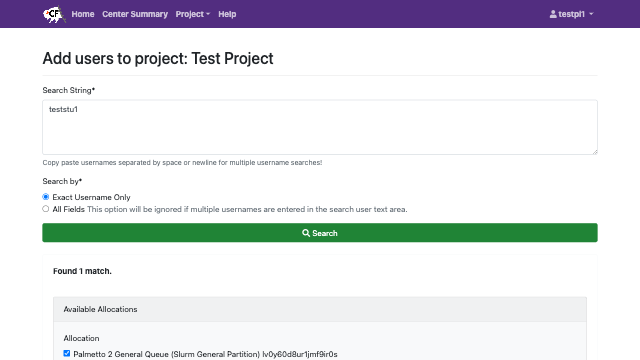
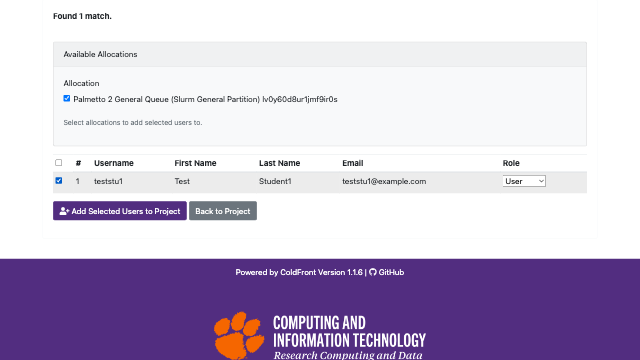
Search for user. You can search by username, first name, last name, or email. If you are searching by username, you can bulk add by adding each username on each new line.
 .
. -
Select the user in the search result you want to add (you can add multiple) and (if applicable) select any allocation you want to add the user to. Then press the Add Selected Users button.
 .
.
Removing Users
You can also just remove users from an allocation without removing them from the project. See the allocation user management documentation.
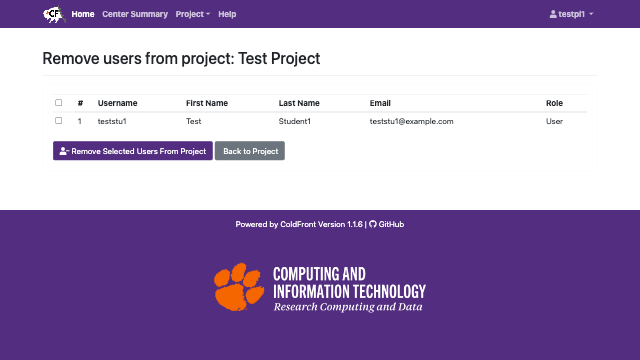
To remove users from a project:
-
Go to the project page. You can select it from the projects list page.
. -
Select the Remove User button.
. -
Select the user(s) to remove, then press the Remove Selected Users button.
 .
.
Managers
A project owner can specify certain users as Managers. These users can help administrate the ColdFront project on behalf of the faculty member (for example, a senior graduate student or class TA).
Managers can:
- Request Allocations
- Renew Allocations
- Add and Remove Users
- Add grants, publications, and research outputs
- Submit project reviews
To convert a user to a Manager:
-
Go to the project page. You can select it from the projects list page.
. -
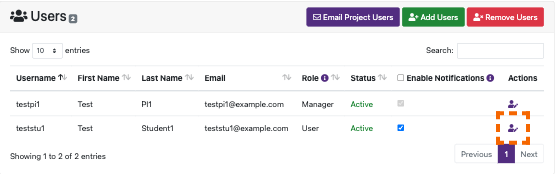
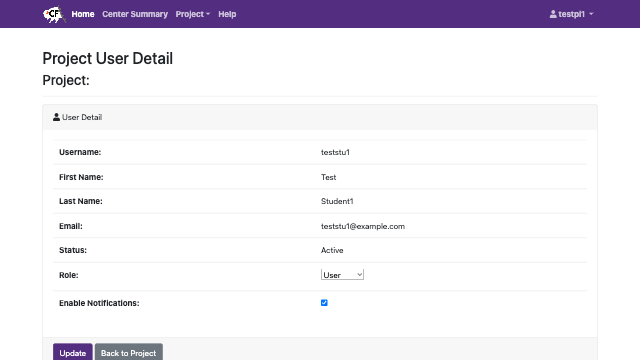
In the Users section, select the Edit link for the user to be converted.
 .
. -
Select the Manager role and press update.
 .
.
Notification Preferences
If Project Users do not want to be notified about allocation approval and expirations, they can opt out of notifications.
Notifications cannot be disabled for the Project Owner or Managers.
-
Go to the project page. You can select it from the projects list page.
. -
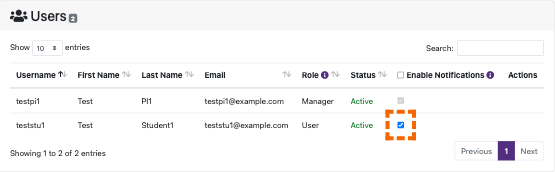
In the Users section, uncheck enable notifications checkbox for the appropriate user.
Review
Each project is reviewed annually. The purpose of this review is to protect your data by having you review and validate who has access to your project. A second purpose is to capture Clemson research products that were facilitated, in part, by the availability of Palmetto HPC and Indigo storage. New or renewed ColdFront allocation requests will be temporarily placed on hold until this review is completed.
When your project is due for review, you will see a message on the top of the project page.
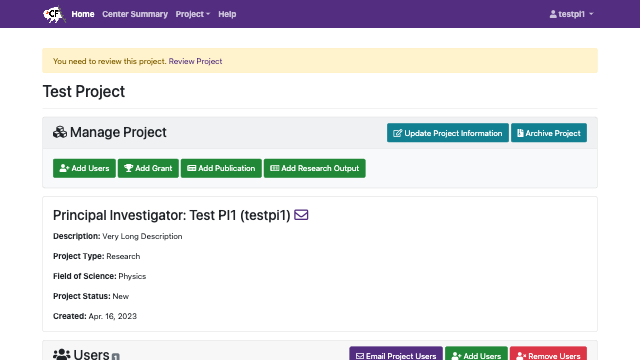
To complete a review, the project owner or a Manager should perform the following steps from the project page in ColdFront:
- Verify project description is accurate and updated.
- Add any new publications from the past year that were related to this research project.
- Add any new grants from the past year that were related to this research project.
- Add any other research outputs from the past year, including theses and dissertations.
- Update the users within the project. Make sure you remove any users that are no longer working on the project.
Finally, you select the "Review Project" link at the top of the project page to complete the review. You will attest that you have updated the project to the best of your ability.
- If no grants have been added or updated in your ColdFront project during the past 12 months, a checkbox labeled "I had no grants during the past 12 months." will be displayed. If this applies to you, please leave the box checked. Otherwise, update your grant information.
- If no publications have been added in your ColdFront project during the past 12 months, a checkbox labeled "I had no publications during the past 12 months." will be displayed. If this applies to you, please leave the box checked. Otherwise, update your publication information.
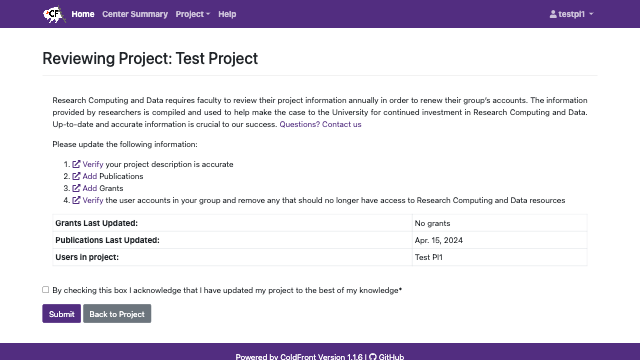
Then submit the form. Once we receive your project review submission and complete our review, you will be able to request or renew allocations again.
Archive
Once a project is no longer in use, it can be archived. Archiving a project removes it from your active list and expires all allocations associated with it.