Quota Management
Each storage allocation on Indigo has a quota, which defines the maximum amount of data that can be stored in your space.
Keeping your data within your allocated quota is critical to the functionality of your storage space. This page explains how to determine your quota, your current usage and other useful information.
Quota Usage Calculation
Your quota usage is slightly different from the logical amount of disk space used. For more details, please see the Indigo Owner's Guide.
Checking Quota Usage
The easiest way to check your quota usage will vary based on how you connect to Indigo.
From Palmetto 2
To check how much of your storage quota you are using on your Indigo project
space from the Palmetto cluster, you can use the checkproject command.
The command takes one argument that indicates which space you want to check. Place a dash between the owner's username and the name of the space.
The checkproject command is only available on the login nodes.
For example, say I have project space at /project/tiger/football, I could run
the command:
$ checkproject tiger-football

Date: Mon Jan  1 12:30:44 EDT 2024
=====================================
Project Space   : /project/tiger/football
Total Capacity  : 3096 GB
Used            : 1104 GB
Available       : 1992 GB
You can use the Total Capacity, Used, and Available values displayed in the output to understand your quota and usage.
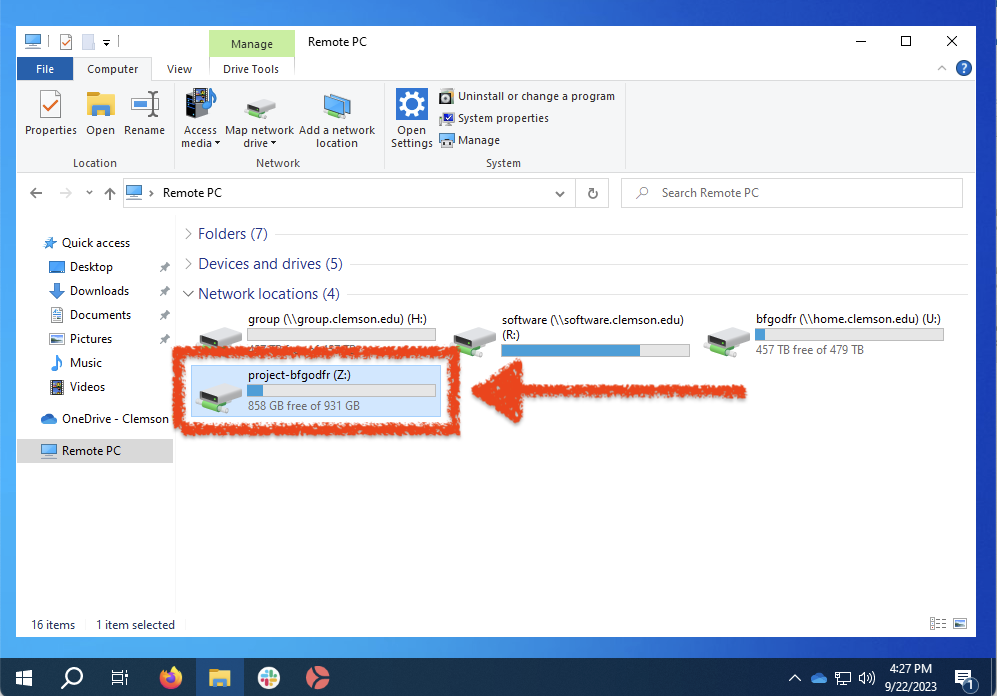
From Windows, over SMB Protocol
Viewing your usage on Windows is easy. Simply open the File Explorer and go to This PC.
If you have already mapped your Indigo space as a network drive, you will see it listed under Network locations along with its current usage, just like any other storage device attached to your computer.
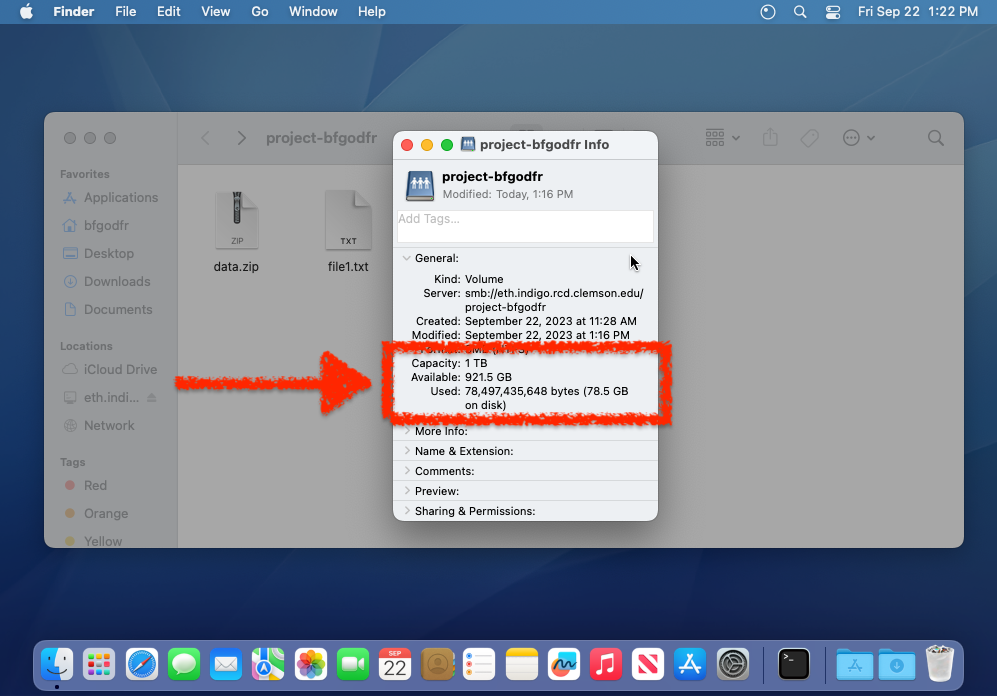
From macOS, over SMB Protocol
To view your usage on macOS, you can follow the steps below:
-
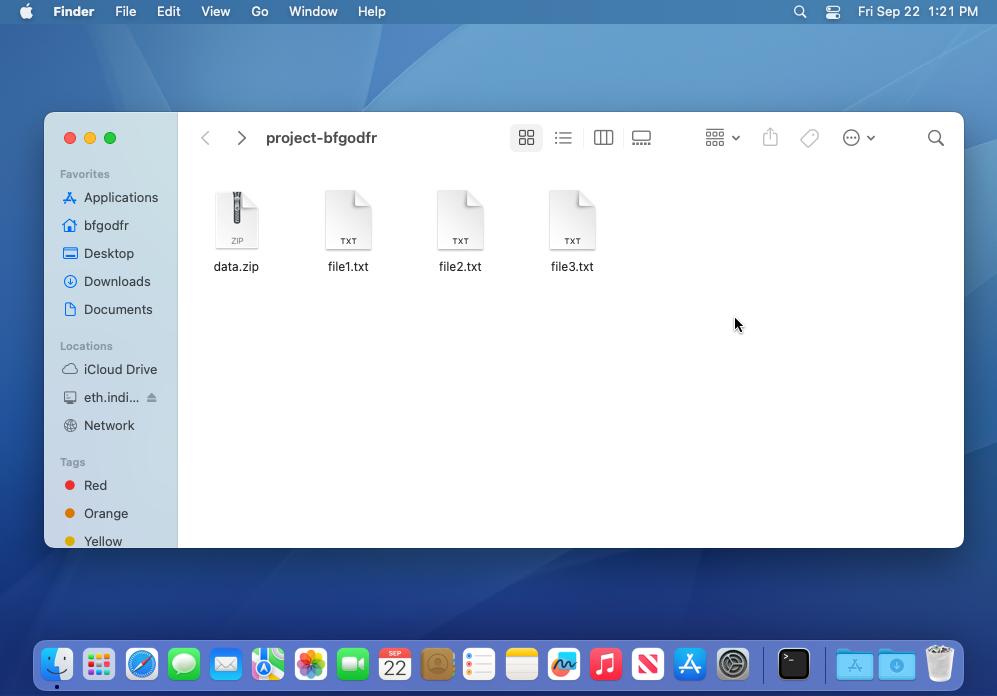
Open your project space in the Finder.
infoThis must be the root directory of your project, not a subfolder.
-
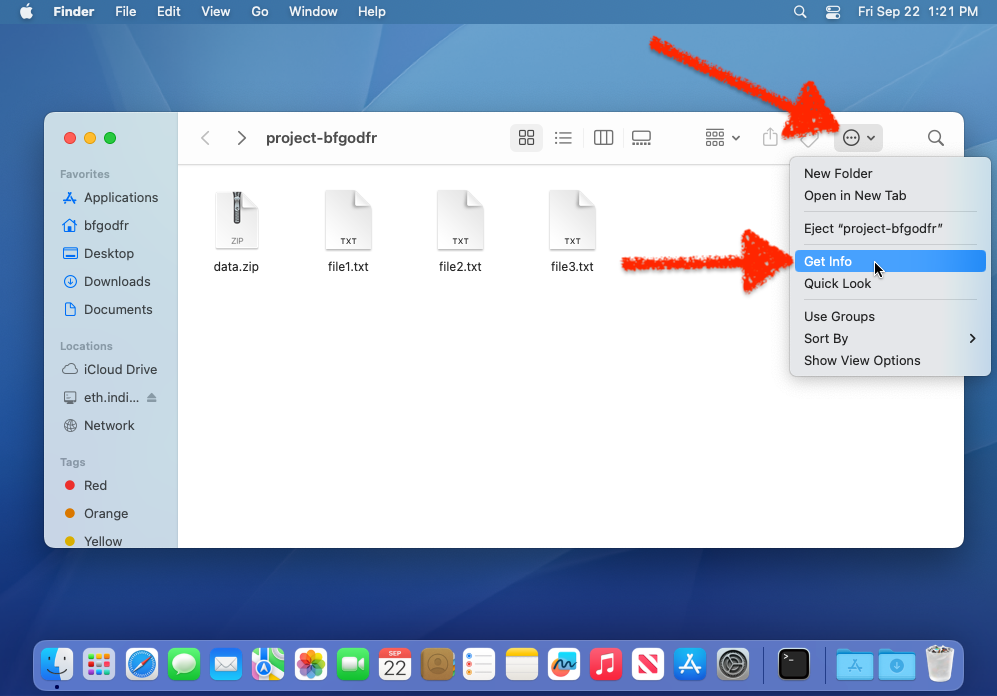
At the top of the Finder window, click the perform tasks button, which looks like a circle with three horizontal dots in it. Then, from the menu that appears, select Get Info.
-
From the information window that appears, you can see the Capacity, Available, and Used rows to learn more about your quota.
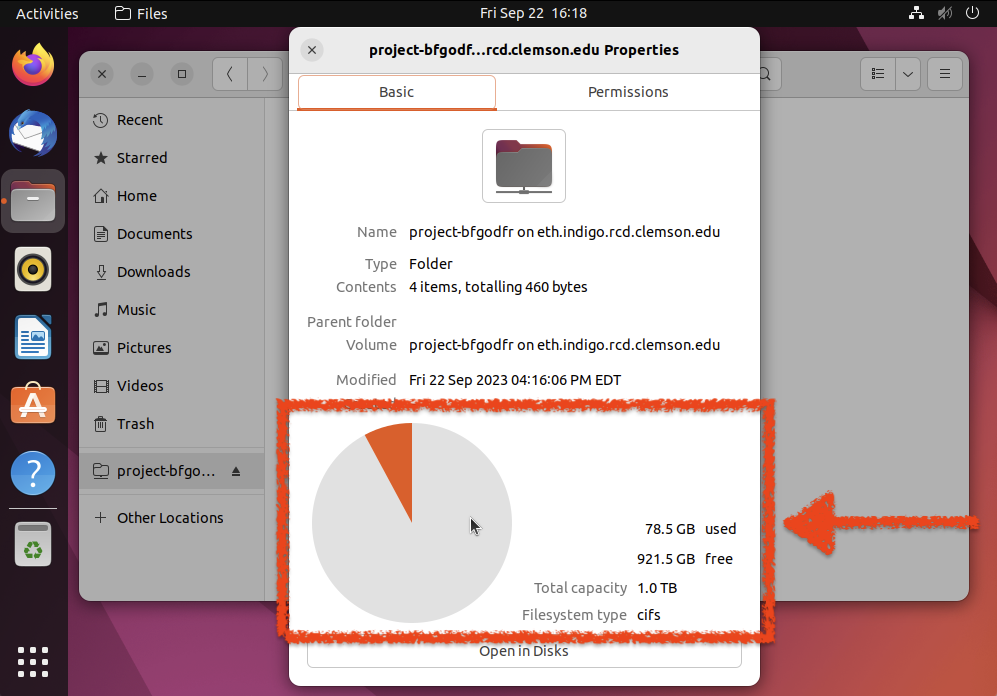
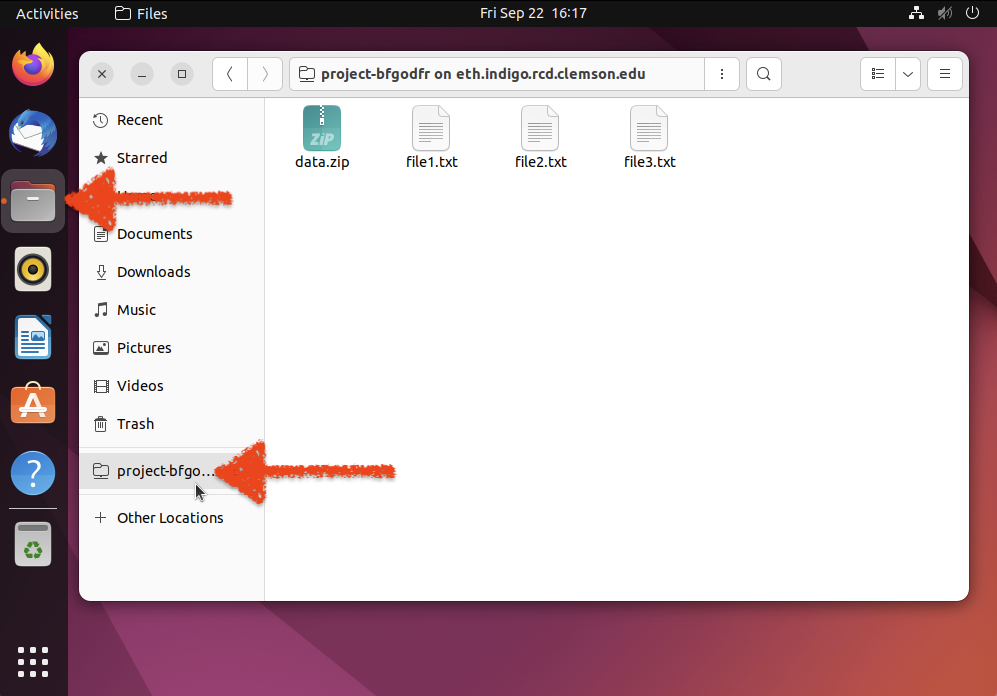
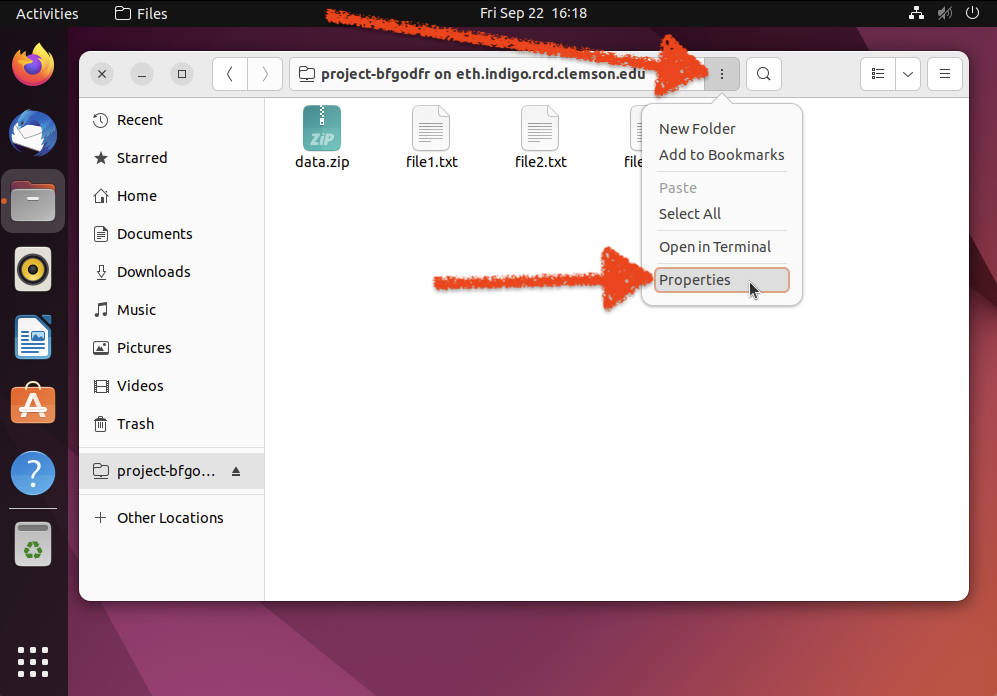
From Ubuntu, over SMB Protocol
To view your usage on Ubuntu, you can follow the steps below:
-
Open the Files app and select your project space from the sidebar.
-
From the overflow menu in the address bar, select the Properties option.
-
In the Properties window that appears, you can see the amount of used space, free space, the total capacity and a pie chart that visually describes your usage.