Palmetto Desktop
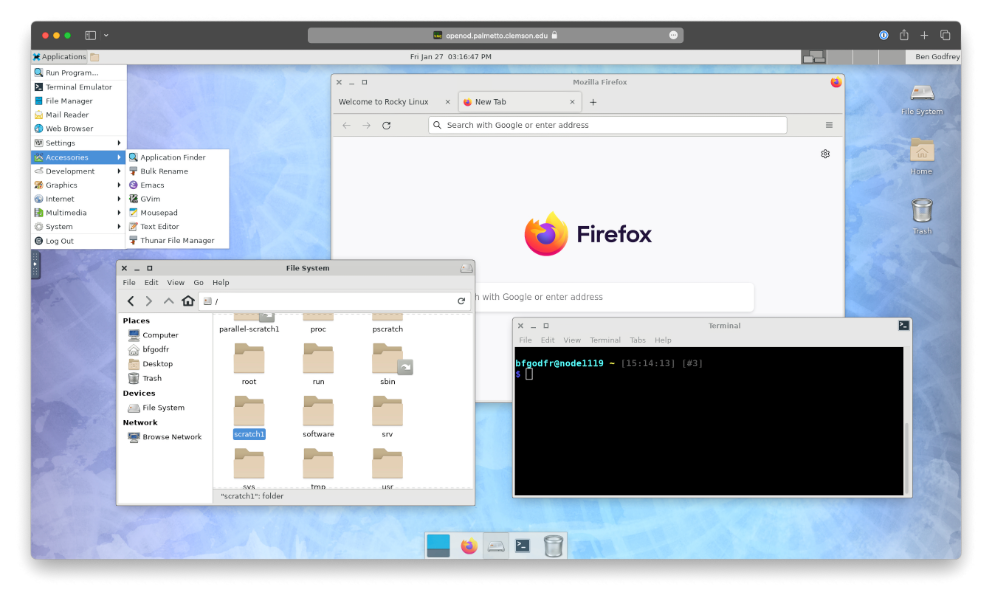
The Palmetto Desktop app provides a graphical desktop interface that will run directly on the compute nodes. We use XFCE 4 for our desktop environment because of its user-friendly interface and low resource usage.
Use Cases
Compared to other ways to run graphical software on the cluster, the Palmetto Desktop is typically the easiest remote desktop solution since it requires no special client software. Only a web browser is needed to connect.
The desktop will run directly on a compute node, so you have the full power of the Palmetto 2 cluster available to your graphical application. Like other Open OnDemand apps, you can specify the exact number of cores, amount of memory (RAM), number of GPUs, and more to target specific hardware for your job.
How to Connect
-
Navigate to Open OnDemand in your web browser.
-
If prompted, log in with your Clemson University credentials and complete multi-factor authentication through Duo Security.
-
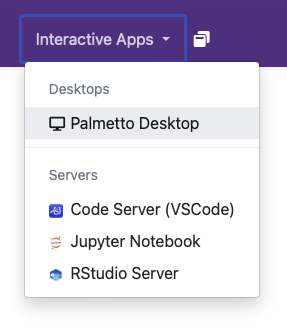
Once you are logged in, click the Interactive Apps menu in the top navigation bar.
-
Click on the Palmetto Desktop link.
-
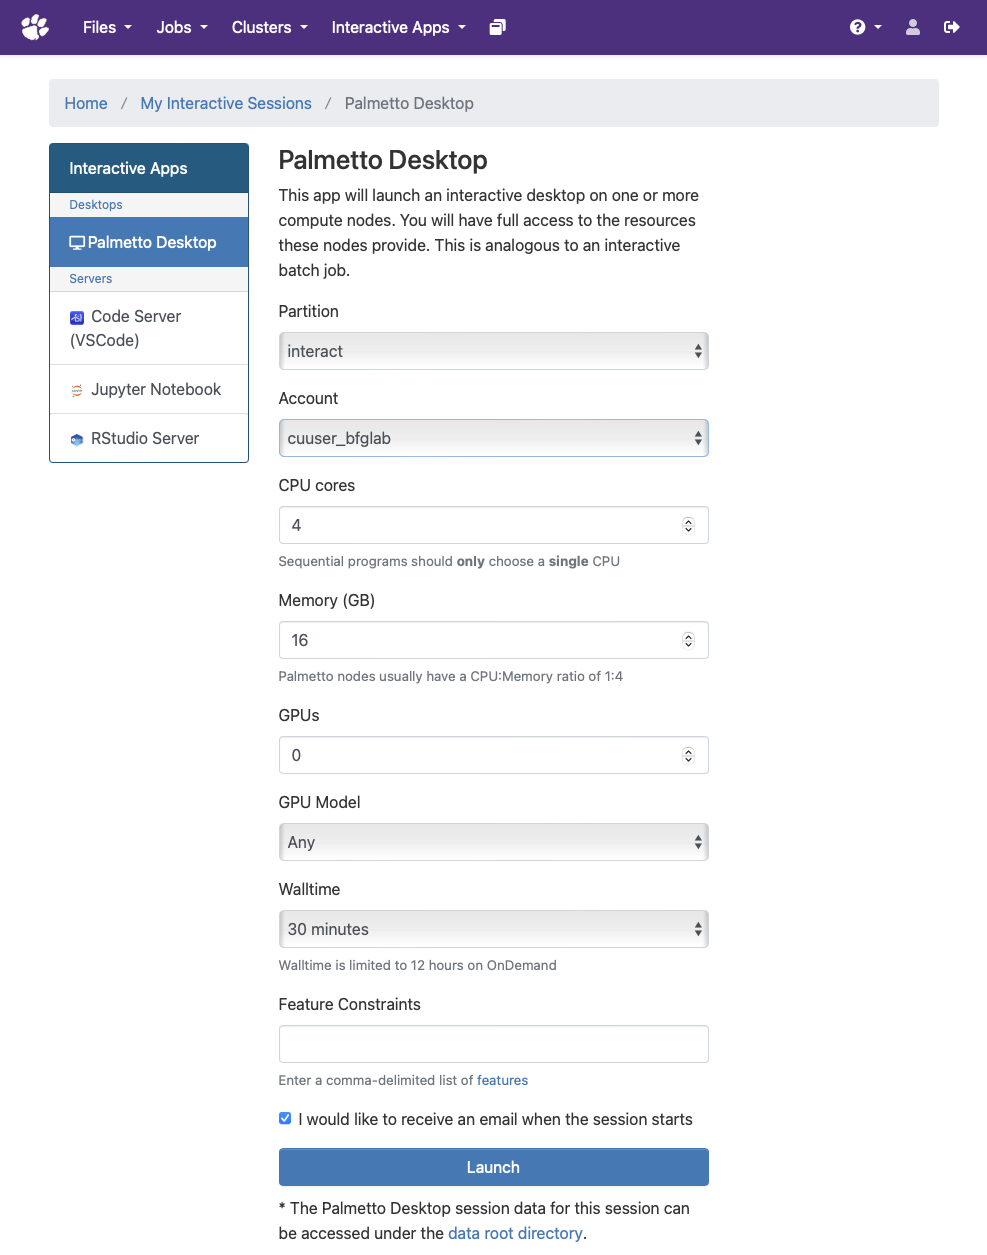
Select the screen resolution and resources (CPU cores, memory, GPUs, wall time, etc) required for your session.
tipGPUs are not required to render the Palmetto Desktop. Don't request a GPU unless your software requires one – this will increase your queue wait time and waste resources that other users might need.
-
Press the Launch button at the bottom of the page when you are ready.

-
Wait for your job to reach the top of the queue.

-
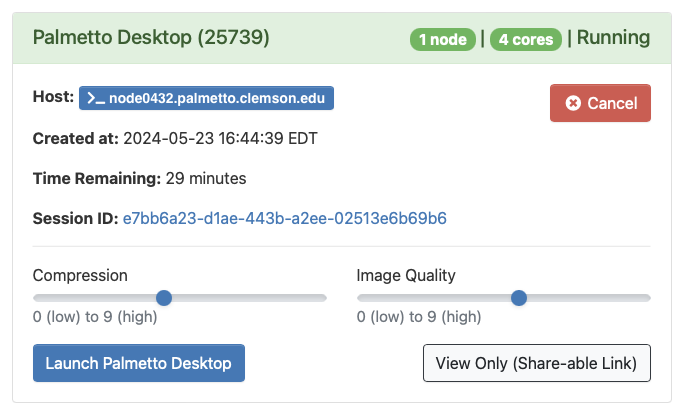
When your job has started, press the Launch Palmetto Desktop button to connect.
tipBefore you launch the desktop, you can select compression and quality options. If you have a weak internet connection and experience performance issues with Palmetto Desktop, reducing quality or increasing compression might help.
-
Complete your work on the desktop session.
Limitations
There are a few known limitations to the Palmetto Desktop that you should be aware of:
- Web browsers will frequently terminate resources for tabs and windows that the user has not interacted with for some time. You may need to reconnect if you have been away for a few minutes.
- Total wall time of your desktop session is limited by the standard wall time limits.
VirtualGL
OpenGL applications can run on Palmetto 2 using VirtualGL which provides methods for remote 3D rendering. VirtualGL supports two back ends: EGL and GLX. EGL is a newer protocol that allows direct communication with the GPU (if available). GLX uses an X server on the node to communicate with a GPU. The EGL back end is easier to use and will work in jobs where no GPU is requested (using software rendering) so it is what we recommend you try first. If your application does not work or if it renders improperly, try switching to the GLX back end. It is older and has broader support.
EGL Back End
To run your OpenGL program using EGL, run with:
vglrun -d egl <application>
For example, to run the application glxgears, you should run:
vglrun -d egl glxgears
GLX Back End
The GLX back end will only work if you requested a GPU (whereas the EGL back end
can fall back on software rendering). To use this backend, pass -d :0.<S> to
the vglrun command, replacing <S> with the GPU number your job was assigned.
Knowing which GPU was assigned to your job can be tricky, so one method could be
to use trial and error. If you asked for one GPU and landed on a node with 2
GPUs (most GPU nodes have 2 GPUs), then one of these commands will work and the
other will error out with a segmentation fault:
vglrun -d :0.0 glxgears
vglrun -d :0.1 glxgears
OpenGL in Containers
If you are running a application in a container, you can have it make use of
VirtualGL for OpenGL, but you will need to install VirtualGL in the container
and run the application with vglrun.
As an example, here is how you can run glxgears in an Ubuntu container.
First, open Palmetto Desktop and request 4 cores, 16 GB memory, and 1 GPU. Then
open a terminal, and pull the Ubuntu Docker image into a sandbox environment so
we can install some packages. We work in $TMPDIR
(local scratch)
which will be much faster than a network mounted file system.
cd $TMPDIR
apptainer build --sandbox ubuntu-sandbox docker://ubuntu:jammy
Next, start the container as root:
apptainer run -B $TMPDIR:/tmp --fakeroot --writable ubuntu-sandbox
Within the container, install packages needed for VirtualGL as well as
mesa-utils (which has glxgears):
export TMPDIR=/tmp
apt update
apt install curl libegl1-mesa libxtst6 libxv1 libglu1-mesa libopengl0 mesa-utils
curl -Lfo /tmp/vgl.deb 'https://sourceforge.net/projects/virtualgl/files/3.1/virtualgl_3.1_amd64.deb/download'
dpkg -i /tmp/vgl.deb
Now we can test glxgears. Run (from within the container):
vglrun -d egl glxgears
This will work, but will use software rendering. We can confirm this by running:
vglrun -d egl glxgears -info | grep RENDER
And we'll see the following as output:
GL_RENDERER = llvmpipe (LLVM 15.0.7, 256 bits)
To use hardware rendering and make use of the GPU we requested, we will have to
exit the container (run exit) and restart the container passing the --nv
argument which will expose the GPU to the container. Since we are no longer
installing software, I'll drop the --writable and --fakeroot flags.
apptainer run -B $TMPDIR:/tmp --nv ubuntu-sandbox
We should now be able to run the GLX back end for VirtualGL with hardware acceleration. One of these commands will work, one will not (depending on whether we landed on the first or second GPU).
vglrun -d :0.0 glxgears -info | grep RENDER
vglrun -d :0.1 glxgears -info | grep RENDER
The command that works should yield the spinning gears and the following renderer:
GL_RENDERER = Tesla K20m/PCIe/SSE2
Once we have the container setup the way we want, we can build it into a SIF so it is more portable:
apptainer build glxgears.sif ubuntu-sandbox
Remember to move any built image out of /local_scratch before your jobs ends.
Once we have our image, we can use it to pull up glxgears:
apptainer run --nv glxgears.sif vglrun -d :0.0 glxgears