Instructions for Linux
Many desktop file managers on Linux support the SMB protocol, so you can easily
mount your Indigo storage space. With libraries like gvfs and fuse, it is
possible to do this in userspace without root privileges.
Ubuntu
The instructions below focus on Ubuntu 22.04 LTS, which uses the GNOME 3 desktop environment and the Nautilus file manager.
To mount the storage, follow these steps:
-
Before you begin, make sure you are connected to the Clemson Network.
cautionThis means that you must either be on campus or connected to CUVPN.
-
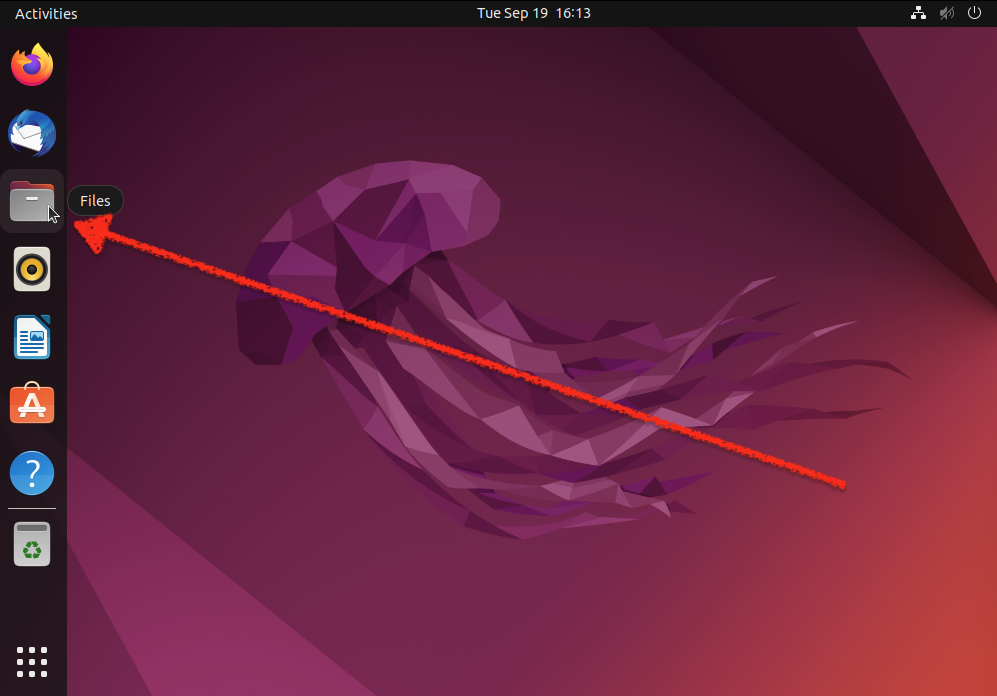
Open the Files app from the dock.
-
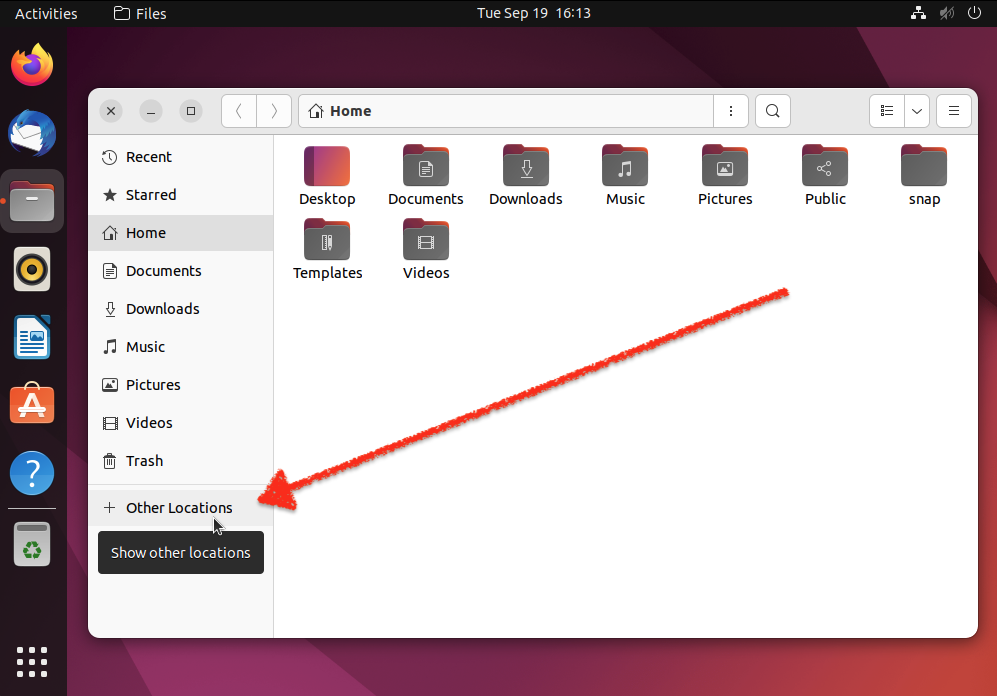
Click the Other Locations option in the sidebar.
-
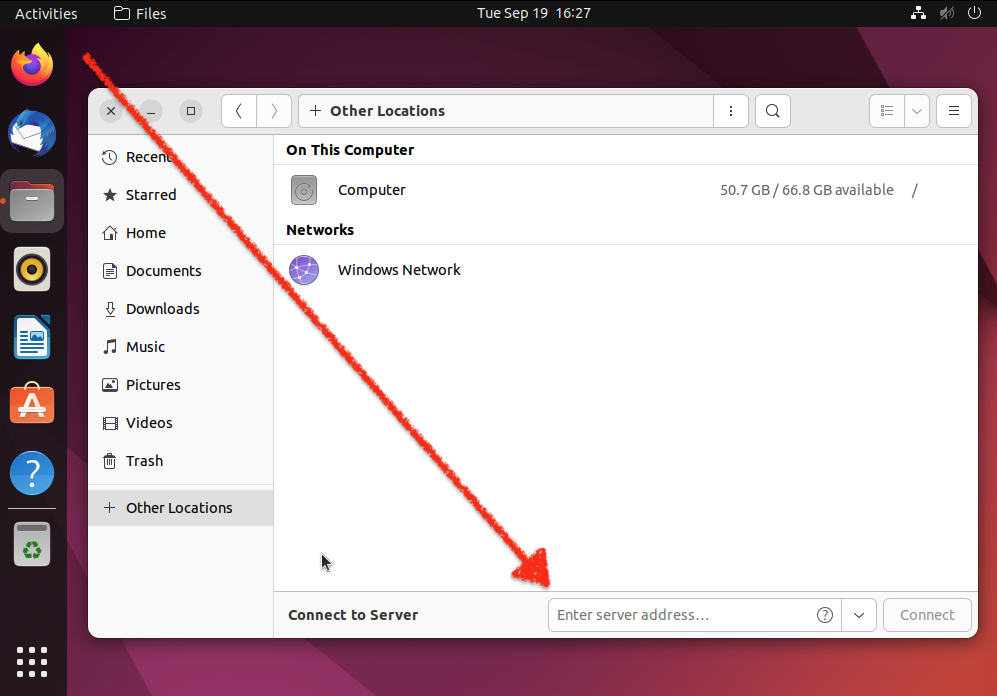
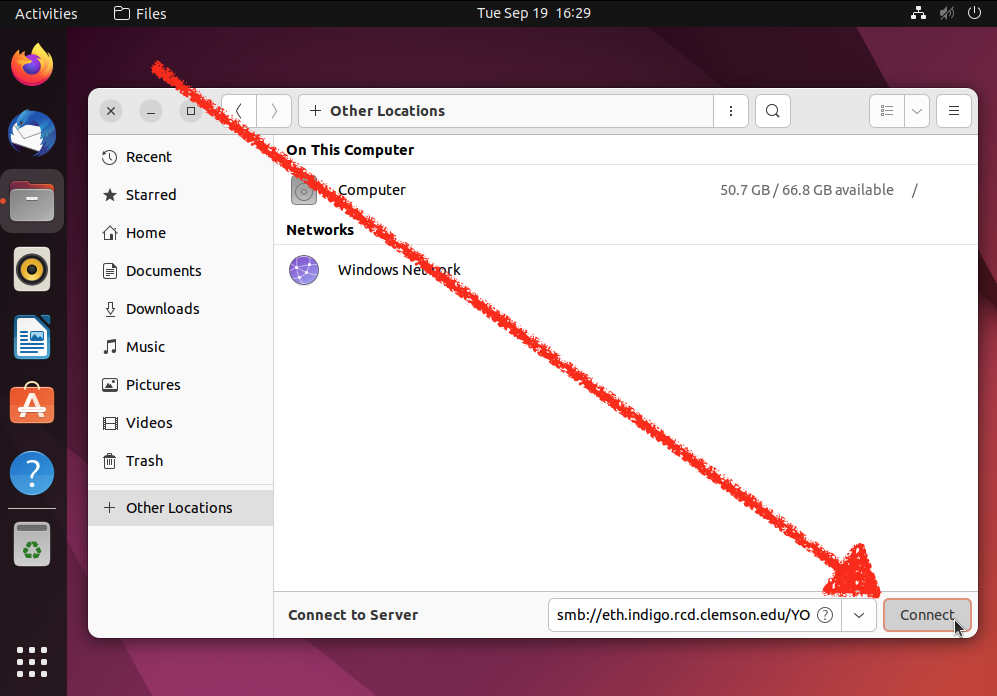
Find the Connect to Server box at the bottom of the Files window.
-
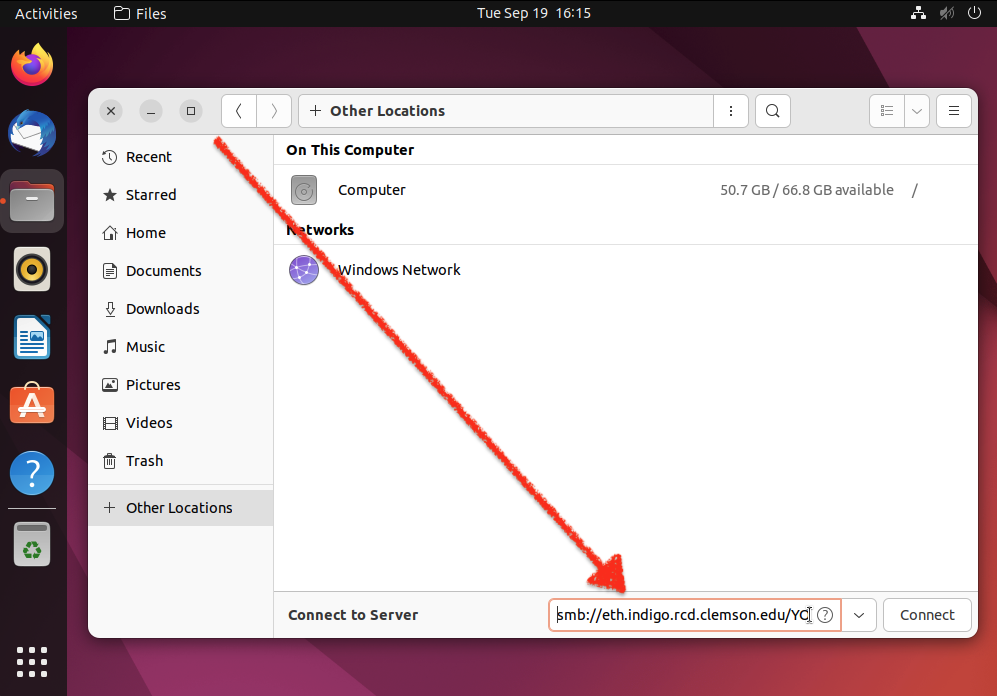
In the Connect to Server box, enter the following address:
smb://eth.indigo.rcd.clemson.edu/YOUR-PROJECT-SHARENoteYou must replace
YOUR-PROJECT-SHAREwith the share name for your space. This will be provided by our storage team when you request SMB access.ReminderAll access methods are disabled by default. SMB access to your space is only enabled if the owner has requested SMB access.
-
Press the Connect button.
-
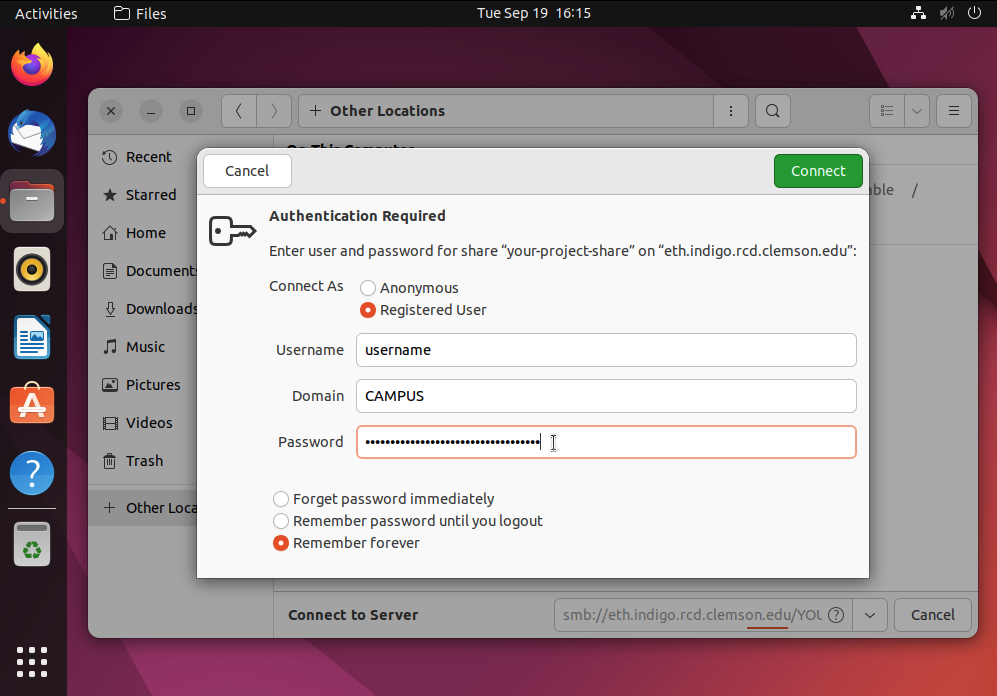
The Authentication Required dialog box will appear to collect your credentials.
-
In the Username field, enter your Clemson username.
noteEnter just your username, not your email address (do not include the @ symbol).
-
In the Domain field, enter
CAMPUS. -
In the Password field, enter your Clemson password.
-
If you are not using a shared computer and you would like for this computer to remember your Clemson credentials, you may select the Remember forever option.
-
Press the green Connect button in the top right corner when you have finished entering your information.
-
-
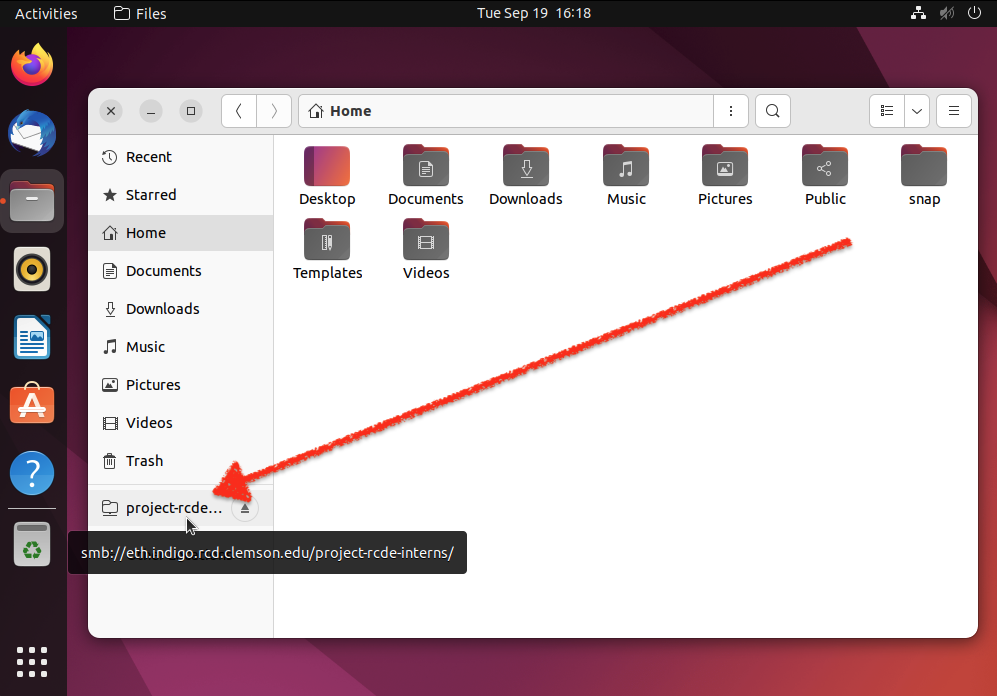
The storage should now be visible in the sidebar of the Files app.
Other Systems
If you are using a different Linux distribution, desktop environment, or file manager application, these instructions may not exactly match the steps you need to take on your system.
Please submit a support ticket if you need assistance mounting your storage with a different Linux system.