Online Material - Part 2
Welcome to the online material for Part 2 of the Introduction to Research Computing on Kubernetes workshop.
In this part we will cover:
- Helm
- Deployments
- Services
- Ingresses
- Building Image in RCD Gitlab
- Deploying a science gateway
Helm
In the previous section we were using kubectl exclusively. It allows you to
create/list/inspect/destroy Kubernetes objects. But it has a lot of limitations.
Suppose you want to share your app with others? In the previous section we just
manually changed "USERNAME" to your username, but what if There are extensive
customizations needed to deploy in another environment? How can we allow those
customizations? And how can we support multiple versions and safe version
changes?
A common answer to these questions is to use Helm. Helm is a package manager for Kubernetes. When people write applications to be deployed on Kubernetes, they often provide Helm charts.
Install
Mac:
cd nrp-workshop
curl -LfO https://get.helm.sh/helm-v3.16.2-darwin-amd64.tar.gz
tar -xf helm-v3.16.2-darwin-amd64.tar.gz
mv darwin-amd64/helm ./helm
chmod +x ./helm
chmod 0600 ~/.kube/config
export PATH=$PWD:$PATH
Linux:
cd nrp-workshop
curl -LfO https://get.helm.sh/helm-v3.16.2-linux-amd64.tar.gz
tar -xf helm-v3.16.2-linux-amd64.tar.gz
mv linux-amd64/helm ./helm
chmod +x ./helm
chmod 0600 ~/.kube/config
export PATH=$PWD:$PATH
Windows (powershell):
cd nrp-workshop
curl -LfO https://get.helm.sh/helm-v3.16.2-windows-amd64.zip
tar -xf helm-v3.16.2-windows-amd64.tar.gz
mv windows-amd64/helm.exe ./helm.exe
$currentPath = Get-Location -PathType Absolute
$env:Path += ";$currentPath"
Creating first chart
A chart is a Helm "package". It contains all the resource definitions needed to run the application on a Kubernetes cluster.
Create a new chart called workshop:
helm create workshop
This new chart is created as a new directory with various files and subdirectories.
Chart.yaml: Describes the chart metadata (name, description, version, etc.)charts: A directory for any charts on which this chart depends.templates: A directory containing Kubernetes object templates.values.yaml: Contains configuration values for this chart.
The helm command creates a bunch of useful starter files. For now, let's remove many of them to start from scratch:
rm -rf workshop/templates/*
rm -rf workshop/values.yaml
touch workshop/values.yaml
Now you should have an empty workshop/templates directory and an empty values.yaml file.
As a first example, let's create a chart that creates the same pod we created in part 1 of the workshop. Save the following as workshop/templates/pod.yaml:
apiVersion: v1
kind: Pod
metadata:
  name: test-pod-{{ .Values.username }}
spec:
  containers:
    - name: mypod
      image: ubuntu
      resources:
        limits:
          memory: 100Mi
          cpu: 100m
        requests:
          memory: 100Mi
          cpu: 100m
      command: ["sh", "-c", "echo 'I am a new pod' && sleep infinity"]
We already see some of the power of helm. Instead of having a pod name of
test-pod-USERNAME that had to be manually changed, our template has
test-pod-{{ .Values.username }}. Helm uses
Go templates to allow substituting in
different variables.
In particular, values set in the values.yaml file are available in the Values
object. So, instead of setting username everywhere in all templates we create
today, simply edit the workshop/values.yaml file to have the following (replace
USERNAME with your username):
username: dndawso
Installing Charts
To install a chart in Helm, we need to come up with a unique release name. This allows the same chart to be installed multiple times within a cluster as long as the release name is different.
For our workshop, I'll assume we will install using release name of
workshop-dndawso. You should pick a unique name (perhaps changing dndawso to
your username.
First, let's run the dry-run mode:
helm install --dry-run workshop-dndawso ./workshop
The dry-run mode will not actually do the install, it will just print the generated manifests:
▶ helm install --dry-run workshop-dndawso ./workshop

NAME: workshop-dndawso
LAST DEPLOYED: Thu Nov  7 23:50:55 2024
NAMESPACE: clemson-nrp-workshop
STATUS: pending-install
REVISION: 1
TEST SUITE: None
HOOKS:
MANIFEST:
---
# Source: workshop/templates/pod.yaml
apiVersion: v1
kind: Pod
metadata:
  name: test-pod-dndawso
spec:
  containers:
    - name: mypod
      image: ubuntu
      resources:
        limits:
          memory: 100Mi
          cpu: 100m
        requests:
          memory: 100Mi
          cpu: 100m
      command: ["sh", "-c", "echo 'I am a new pod' && sleep infinity"]
Now you can install with:
helm install workshop-dndawso ./workshop
To check to see all installed helm charts, run:
helm list
We can confirm that the pod is running with:
kubectl get pod
Let's remove the workshop/templates/pod.yaml file, then look at creating a
deployment. We don't have to worry about deleting the pod in Kubernetes. Helm
will take care of that on the next deploy we do.
Deployments
Kubernetes deployments are similar to Job in that they provide a way to automatically manage creation and scheduling of pods. Deployments, in particular, are geared towards keeping some number of replica pods running at all times. Deployments are useful for things like web servers and databases.
Let's create a deployment to spin up a bunch of nginx pods. Put the following
contents into a workshop/templates/deployment.yaml file:
apiVersion: apps/v1
kind: Deployment
metadata:
  name: nginx-deployment-{{ .Values.username }}
  labels:
    app: nginx-{{ .Values.username }}
spec:
  replicas: 2
  selector:
    matchLabels:
      app: nginx-{{ .Values.username }}
  template:
    metadata:
      labels:
        app: nginx-{{ .Values.username }}
    spec:
      containers:
        - name: nginx
          image: nginx:1.14.2
          resources:
            limits:
              memory: 200Mi
              cpu: 1
            requests:
              memory: 50Mi
              cpu: 50m
There are a few interesting things to point out about this Deployment specification:
- We can specify the replicas (right now set to 2).
- We specify labels on the pod template and a matchLabels selector on the Deployment. This is required by the Deployment and will also be used later when we create a Service.
We can now apply our new changes to the Helm chart with:
helm upgrade workshop-dndawso ./workshop
Helm should delete the previously created pod and instead create the deployment. This is a lot easier than us having to add and remove things. We let Helm try to replicate the current state in the chart.
We should be able to see our deployment with:
kubectl get deployments
And see the pods that this deployment creates using:
kubectl get pods
We should see 2 pods created.
Scaling
Let's try scaling the deployment. Edit the file to have replicas: 3 and run:
helm upgrade workshop-dndawso ./workshop
Now if you run kubectl get pods you should see 3 pods.
Rollouts
Deployments also allow graceful rollouts. Edit the deployment1.yml file again
and change the image from nginx:1.14.2 to nginx:1.25.3. Then run:
helm upgrade workshop-dndawso ./workshop
kubectl get pod --watch
This will apply the changes to the deployment, then run the rollout status
command which will watch the changes to the deployment.
Self Healing
Another useful feature of deployments are their self-healing nature. Let's delete a pod and see how it self-heals. First, list the pods again:
kubectl get pods
Pick a random pod from your deployment and delete it:
kubectl delete pod nginx-deployment-<suffix>
If we then list the pods you should see that a third pod will be automatically created again.
Port Forwarding
Each of the three nginx pods is serving a basic web service on port 80. We can
forward this port back to our original machine using kubectl port-forward. You
will need the name of one of the pods in the deployment (reminder: you can run
kubectl get pods to see the list of pods). Run:
kubectl port-forward pod/<pod-name> 8080:80
This should forward port 8080 on your local computer to port 80 (the standard web port) on the pod. Once this command is running, try opening http://localhost:8080 in your browser.
You should see the following screen:
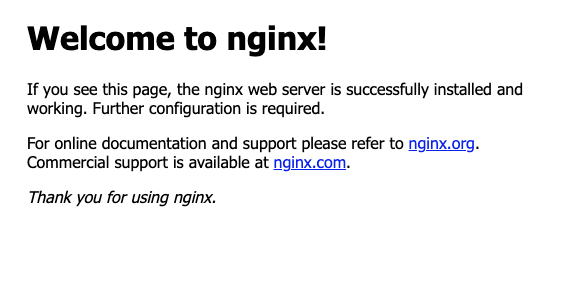
You can press Ctrl-C to stop the port-forward process.
Service
Manually picking a pod to connect to is extra work and brittle. It defeats some of the advantages of having an automatically healing deployment. Services provide a load balancer. It provides a single endpoint and if we connect to it, the service will automatically route the traffic to one of the healthy pods that match a selector.
Create a file workshop/templates/service.yaml with the following contents:
apiVersion: v1
kind: Service
metadata:
  name: nginx-svc-{{ .Values.username }}
spec:
  ports:
    - port: 80
      protocol: TCP
      targetPort: 80
  selector:
    app: nginx-{{ .Values.username }}
  type: ClusterIP
You can now create it:
helm upgrade workshop-dndawso ./workshop
You can list your service with:
kubectl get services
This is a ClusterIP service which means it is allocation a cluster internal IP
and DNS. Within the cluster, you can now access this at
http://nginx-svc-USERNAME. To test this, you can exec into one of the pods and
try to curl http://nginx-svc-USERNAME:
kubectl exec -it <pod-name> -- /bin/bash

curl http://nginx-svc-USERNAME/
If we want to confirm that these requests are being split across different pods, you can open a new terminal and have all the logs from all the pods:
kubectl logs --prefix -f -l 'app=nginx-USERNAME'
If you continue to make curl requests while the logs are running you will see
that they end up being serviced by different pods.
If you want to access this service outside the cluster, you can use the port forwarding command:
kubectl port-forward svc/nginx-svc-USERNAME 8080:80
Ingress
If we want to expose a service outside of the Kubernetes cluster, we use an Ingress object. Ingresses typically can provide load balancing, SSL termination and name-based routing (you can have different domains point at different services). Different Kubernetes clusters have different implementations of Ingress controllers (and some clusters don't support Ingresses at all). In Nautilus, the Ingress uses HAProxy Ingress controller.
Create a file called workshop/templates/ingress.yaml with the following
contents:
apiVersion: networking.k8s.io/v1
kind: Ingress
metadata:
  annotations:
    kubernetes.io/ingress.class: haproxy
  name: nginx-ingress-{{ .Values.username }}
spec:
  rules:
    - host: nginx-{{ .Values.username }}.nrp-nautilus.io
      http:
        paths:
          - backend:
              service:
                name: nginx-svc-{{ .Values.username }}
                port:
                  number: 80
            path: /
            pathType: Prefix
  tls:
    - hosts:
        - nginx-{{ .Values.username }}.nrp-nautilus.io
You can create the ingress with:
helm upgrade workshop-dndawso ./workshop
You service and deployment pods should now be exposed outside of the cluster as
https://nginx-USERNAME.nrp-nautilus.io. The ingress will even handle SSL
termination for you.
Cleanup workshop-dndawso
Since we used Helm, cleanup is easy:
helm uninstall workshop-dndawso
Building and deploying a Science Gateway from RCD GitLab
-
First login to git.rcd.clemson.edu.
-
Fork the palmetto/intro-k8s2 repo.
-
Clone the repo locally:
git clone https://git.rcd.clemson.edu/<username>/intro-k8s2
cd intro-k8s2 -
Enable CI/CD and Container Registry at Project -> Settings -> General -> Visibility, project features, permissions
-
Enable CI/CD Runners at Project -> Settings -> CI/CD -> Runners -> Enable Instance runners.
-
Run a build: In Gitlab, select Build -> Pipelines -> New pipeline -> New pipeline.
-
Create an access token that can be used to pull registry images:
- Settings -> Access Tokens -> Add new token
- Token name: intro-k8s-USERNAME
- Role: Developer
- Scopes: only "read_registry"
-
Create a values.yaml file that we will use to store the gitlab access token and your username:
dockerRegistryToken: "<access token value>"
username: "<clemson username>"
Now go ahead any deploy the Helm chart located in the intro-k8s2/helm
directory. From within the intro-k8s2 directory, run (replacing dndawso with
your username):
helm install -f values.yaml gateway-dndawso ./helm
Once it is running, test by going to https://gateway-USERNAME.nrp-nautilus.io.
Cleanup gateway-dndawso
Remember to remove all Kubernetes objects by running:
helm uninstall gateway-dndawso