Project Sharing with Globus
Globus can be used to securely share your data on Indigo with external users.
Before you proceed, make sure that you have already created a Globus account and understand how to access the Clemson RCD Data Transfer Collection from the Globus web application.
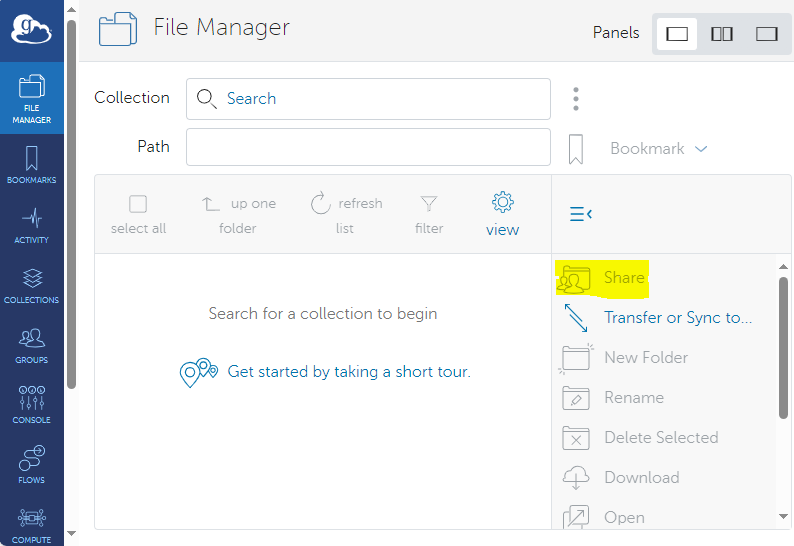
Once you have access to the Clemson RCD Data Transfer Collection you can then create a guest collection. This describes a subset of the data you wish to share and manage permissions on who can view that data. To begin you select a folder in the file manager and click on the share option of the right side menu panel. You then click "Add a Guest Collection" which gives you a link that can be sent to authorized users. This link is what grants access to the collection. You can manage your active globus shares by going to "collections" on the left hand side menu and clicking on the "shareable by you" filter. In this menu you can change permissions or delete the share collection.
Below we provide an example of creating a guest collection based on a folder via the Globus web app.
Note : At this time only /project files are supported for Globus
transfers.

Guest Collections
A guest collection is a method used to share data internally or with an outside party via globus. You can create a guest collection by going to a directory you would like to share and have access to, the right clicking it and hit share.
In the permission tab you can add users or a group of users, grant read or write access, and even share to other groups of users on globus. For additional documentation please see the globus docs
Globus Sharing Caveats and Troubleshooting Advice
It is possible that a user you wish to share a guest collection with will not be able to access said collection. Usually, this is due to a mismatch between their login identity and their email identity. To verify this use the globus CLI. Once installed you should see any valid id's attached to your collection as shown below.
[username@node ~]$ globus get-identities -F json username@clemson.edu
{
  "identities": {
    "email": "username@clemson.edu",
    "id": "c29f53c7-xxxx-xxxx-xxxx-ef11fd4b7960",
    "identity_provider": "73958df3-xxxx-xxxx-xxxx-b13c649713c7",
    "identity_type": "login",
    "name": "Thomas Wright",
    "organization": "Clemson University",
    "status": "used",
    "username": "username@clemson.edu"
  }
}

An Identity that is not used yet

[username@node ~]$ globus get-identities -F json username@g.clemson.edu
{
"identities": []
}
In the event that the person you are sharing data with does not have access to the data but they do have a globus account they may need to add their email address as a globus identity. To do this follow the following steps :
- First make sure you are logged out of Globus completely
- Next login using your institution identity credentials through the drop down menu (the normal login process that you use when logging in via your institution)
- Then click on ACCOUNT in the left sidebar, then Link Another Identity
- Then Click on Link an Email Address and provide your email.
- NOTE : this is not using the drop down menu
- Retrieve the verification code sent to your email (you will be prompted to enter this code in the Globus WebApp to verify your ownership of the Email address)
- Lastly, you will have to verify your primary account, which will be your institutions credentials (used when selecting your institution from the App.Globus.org drop down list of Identity Providers)